1. Resource processing
Attributes:
Resources are objects and persons involved in the production process which have capacities allocated to them.
Resources are allocated to operations and phases in the master recipe and process order. They are used as the basis for the calculation of costs, capacity requirements, and dates.
The resource corresponds to the work center in discrete manufacturing. However, for process manufacturing you can also create a resource network to specify the sequence in which the resources are to be used.
Selection criteria
Choose this component if you want to use PP-PI in your company.
You reach the resource maintenance screen from the SAP main menu by choosing the menu options Logistics >Production - process >Master data >Resources.
To create a resource, proceed as follows:
1. From the resource maintenance menu select the menu options Resource >Create.
This calls up the initial screen for resource maintenance.
2. Enter the following data:
- plant where the resource is located
- resource key which clearly identifies the resource within the plant
- resource category
3. If necessary, enter a resource to be copied. For more information, refer to the section Creating Resources by Copying.
4. Press ENTER. This calls up the Basic Data screen.
You can call up one of the next screens directly in, for example, the change mode by selecting the menu option Goto and then one of the following menu options:
× Basic data
× Assignments
× Capacity
× Scheduling
× Default values
× Hierarchy
× Network
The menu options Assignments, Capacity and Hierarchy each offer additional menu options so you can call up detail screens.
- Transaction code: CRC1
2. Resource hierarchy processing
Attributes:
Resource hierarchies are used in locating resources and cumulating available capacity and capacity requirements, among other things. You must first create a hierarchy before you can assign any resources to it.
To create a resource hierarchy, proceed as follows:
1. Select the menu options Logistics>Production - process >Master data>Resources and then Hierarchy >Create.
This calls up the Create Hierarchy screen.
2. Enter the name of the hierarchy and the plant. Press ENTER.
This calls up the Header Data screen.
3 .Enter a short description of the hierarchy.
4. If you do not want to maintain any more data, save the hierarchy by selecting the menu options Hierarchy>Save.
- Transaction code: CR31
3. Resource network processing
Attributes:
A resource network describes the physical links between resources such as processing units of a line (vessels, reactors). It serves to describe the flow of materials through a line or plant.
It is often not possible to use processing units in any order. For this reason, you can define predecessor and successor relationships of resources in the form of a resource network. In contrast to the normal R/3 network, the resource network however only has Finish-Start relationships.
During process planning, such resource networks are used in order to determine the sequence of resources to be used when a batch is produced.
Resource networks have the following characteristics:
· They are used in the process order to select resources
· They can be displayed and maintained in graphic form
· they can be displayed graphically from the master recipe and process order.
- Transaction code: CR24
4. Processing available capacity
Attributes:
Operating time and daily available capacity of a resource are defined on the capacity screen. Available capacity can be defined for individual resources or for all resources.
Available capacity is defined individually for each capacity category in a resource. You can reference available capacity with a different category during available capacity maintenance.
The following figure shows how available capacity is defined in the R/3 System. Starting point for defining available capacity are the working hours at a particular resource. Working hours are determined by work start and work finish times.
The working hours are necessary for calculating lead time in scheduling since an operation at a resource can only be processed within working hours. However, working hours alone cannot be used for production. The following factors reduce working hours:
· break times
· technical malfunctions
· organizational problems
Break times are subtracted from actual working hours to get productive working hours or theoretically available hours. Productive working hours are calculated by subtracting the technical and organizational downtimes. These productive working hours are called operating time in the system.
You can record the time related to technical and organizational downtimes as capacity utilization on the capacity maintenance screen in the resource. Using the capacity utilization, you can determine for each capacity the percentage of operating time that is productive in a shift.
You can calculate the total available capacity for the resource by multiplying the operating time by the number of individual capacities for the capacity category in question.
Different versions of available capacity with the same capacity category are identified by a version number. The active version is used in scheduling and capacity requirements planning.
- Transaction code: CR12
5. Processing of rough-cut planning profiles
Attributes:
Rough-cut planning profiles are used in resource leveling. In a rough-cut planning profile, you plan the requirements of one or more of the following resources:
· work center capacities
· materials
· production resources/tools
· costs
In a rough-cut planning profile, you define:
· which material, product group, or (in the case of an information structure) combination of characteristic values requires the resources
· the time span of one planning period in the resources table, expressed in days
· the status of the rough-cut planning profile (as in a routing)
· the planner group of the rough-cut planning profile (as in a routing)
· the usage of the rough-cut planning profile (as in a routing)
· the lot size range if the quantity of the resources required depends on lot size
· the key figure causing the resource load (if the rough-cut planning profile is defined for an information structure)
· how much of which resource is required
The amounts you enter for the resource "work center" apply to each capacity category at the work center.
To create a rough-cut planning profile:
1. From the standard SOP or flexible planning menu, select Tools ® Rough-cut planning profile ® Create.
A selection screen appears.
2. Enter the material, product group, or information structure to which you want the rough-cut planning profile to apply. In the case of a material or product group, enter a plant as well. In the case of an information structure, specify the characteristic values and key figures that generate the resource requirements.
3. Select the pushbutton Execute.
The dialog box General Data appears.
4. Enter a time span; the default time span is five days. As necessary, enter a status, a planner group, a usage, and/or a lot-size range.
5. Select ENTER.
The resources table appears.
6. Select the pushbutton Choose.
A dialog box appears asking you to choose between the four resource types.
7. Select a resource type and press Continue.
A dialog box appears in which you specify a resource.
8. Enter the resource which your material, product group, or information structure requires and select ENTER.
You return to the resources table.
9. In the resources table, enter the amount of the resource, per unit of the planning object, that you estimate will be consumed in each period.
The amounts you enter for the resource "work center" apply to each capacity category at the work center.
10. Repeat steps 6 to 9 until you have entered all relevant resources.
11. To check an entry, place the cursor on it and select Check.
The system checks whether the selected resource exists. It also checks that at least one planned figure has been entered on every line. It does not check at this point whether the resource requirements can be met.
12. To save your rough-cut planning profile, select Rough-cut planning profile >Save.
- Transaction code: MC35
 조선말사전--朝鲜语词典
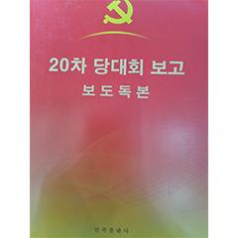
 党的二十大报告辅导读本--20차 당대회 보고 보도독본
 흔히보는 질병과 식이료법/常见病及其饮食疗法
 做理想的自己--리상적인 사람이 되자
 中国古代重要科技发明创造--중국 고대 중요한 과학기술 발명창조입점신청
| 제목 | 글쓴이 | 날짜 | 조회 |
|---|---|---|---|
2003-09-20 |
11866 |
||
2003-09-20 |
11414 |
||
2003-09-20 |
20547 |
||
지구인 |
2010-08-27 |
19343 |
|
지구인 |
2009-09-07 |
13663 |
|
2010-01-29 |
15622 |
||
2004-10-07 |
16718 |
||
2439 [sap] [업무지식] SCM 개념 |
지구인 |
2009-07-10 |
3230 |
지구인 |
2009-07-10 |
5234 |
|
지구인 |
2009-07-10 |
2726 |
|
지구인 |
2009-07-09 |
4039 |
|
지구인 |
2009-07-09 |
2425 |
|
지구인 |
2009-07-09 |
1440 |
|
지구인 |
2009-07-09 |
5112 |
|
지구인 |
2009-07-08 |
2568 |
|
지구인 |
2009-07-08 |
4825 |
|
지구인 |
2009-07-08 |
2552 |
|
지구인 |
2009-07-08 |
2501 |
|
지구인 |
2009-07-07 |
2491 |
|
지구인 |
2009-07-06 |
1280 |
|
지구인 |
2009-07-06 |
3358 |
|
지구인 |
2009-07-06 |
3229 |
|
지구인 |
2009-07-05 |
2296 |
|
지구인 |
2009-07-05 |
2063 |
|
지구인 |
2009-07-05 |
3863 |
|
지구인 |
2009-07-04 |
4480 |
|
2420 [sap] 유용한 자료 공유. |
최강1004 |
2009-06-29 |
2391 |
2009-06-19 |
2481 |